


We covered the subject of BIMI (Brand Indicators for Message Identification) in a previous article. Before it can be displayed correctly in the inbox, this logo must meet several requirements. In this article, we explain how to create it from an SVG image. Follow the guide.
Brief reminder on the BIMI
This recent standard offers email recipients the possibility of immediately identifying the sender by displaying the latter’s logo next to an authenticated email message. A standard that serves both the brand using it and the public, and a source of various advantages for both (better deliverability, increase in the opening rate, fraud prevention, simplified identification of the sender, increased brand visibility, etc.).
What is an SVG image?
The term SVG (Scalable Vector Graphics) refers to a vector format created in the late 90s, commonly used to display images, but also 2D graphics or illustrations on a website. The extension of this format is .svg.
The SVG image is made up of one or more shapes defined by points connected by lines and curves, unlike PNG, GIF and JPEG images which are made up of colored pixels. The particularity of SVG files, compared to the others mentioned, is that they allow the image to be resized (enlargement or reduction) without losing its resolution. A particularly practical asset for brand logos in the context of BIMI.
Create a BIMI logo from an SVG image
Key points to consider
First of all, it is good to know the specific BIMI logo requirements. It should be a Tiny 1.2 SVG file, inscribed in a square, on a plain background, but also able to fit in a circle, as that’s how it appears in some inbox. It must also be published via HTTPS. Finally, the file should not weigh more than 32 KB.
The creation of the BIMI logo with SVG image step by step
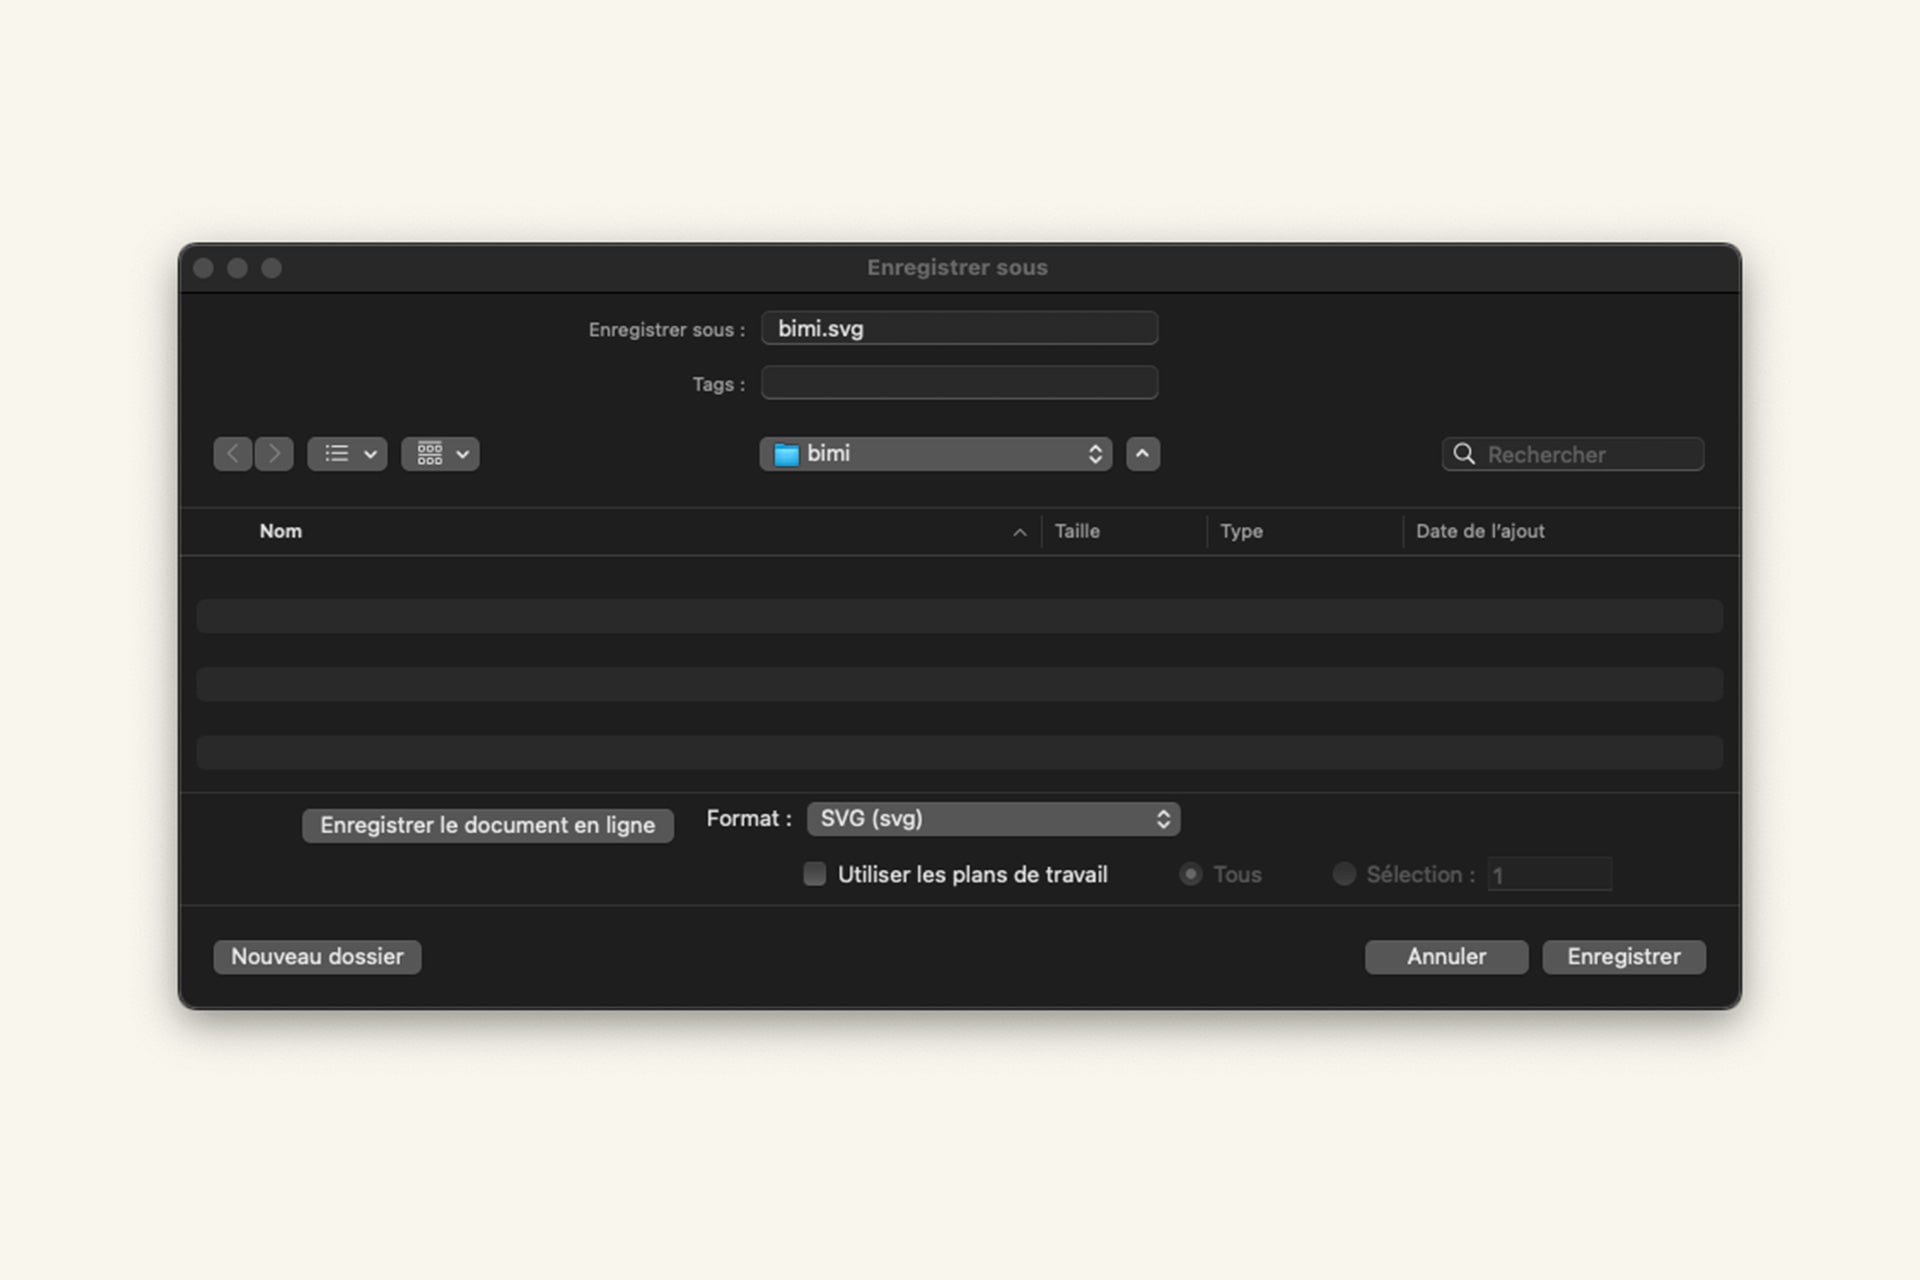
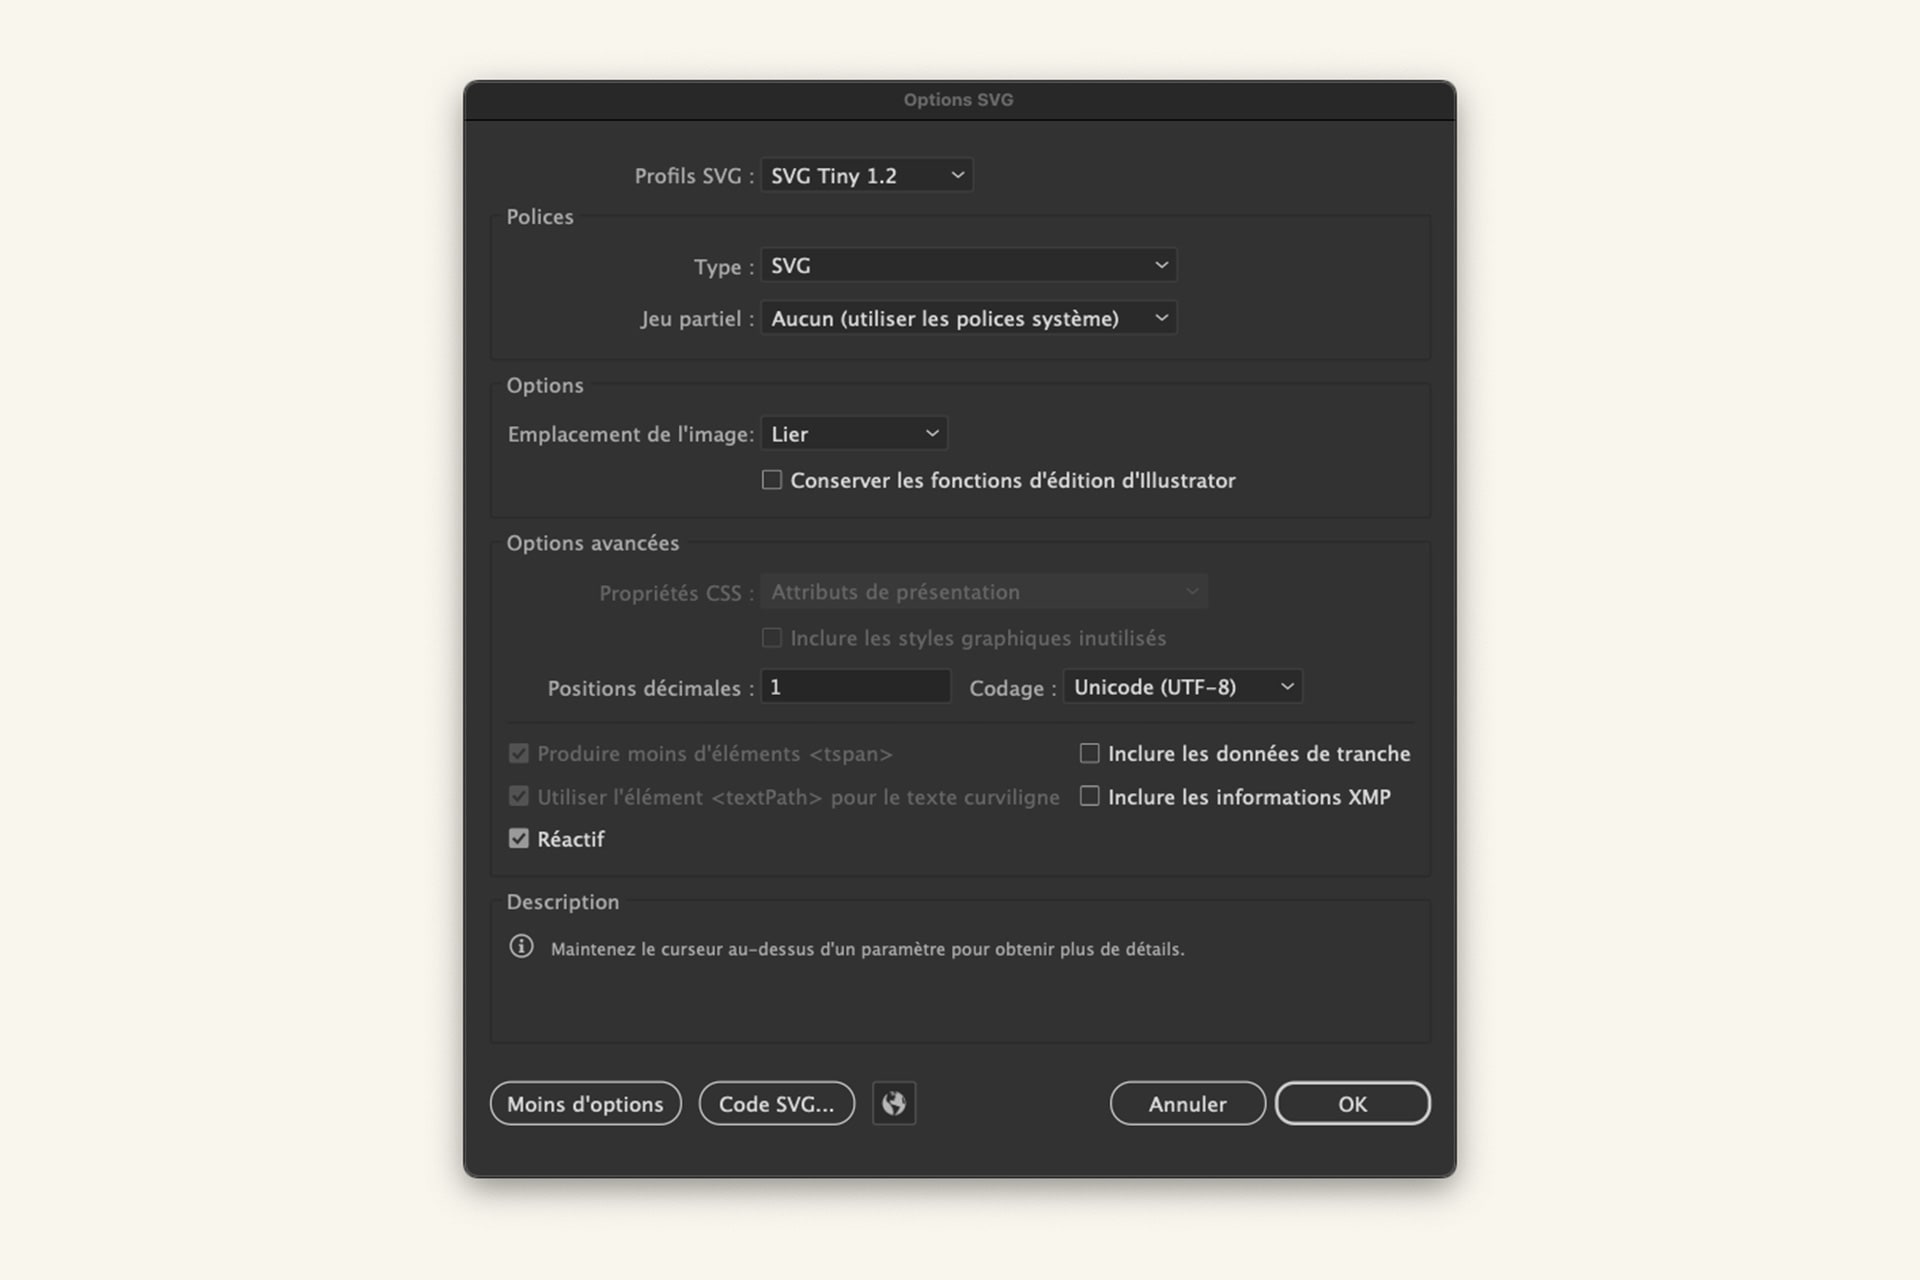
Step 1: Export to SVG Tiny 1.2 using Adobe Illustrator
Open your logo in Adobe Illustrator. When saving the file, name it then select the SVG format (please). Once you click “Save”, a dialog box appears with a “SVG Profiles” drop-down menu. Here, select “SVG Tiny 1.2”. As for the location of the image, click on “Keep”, then validate.
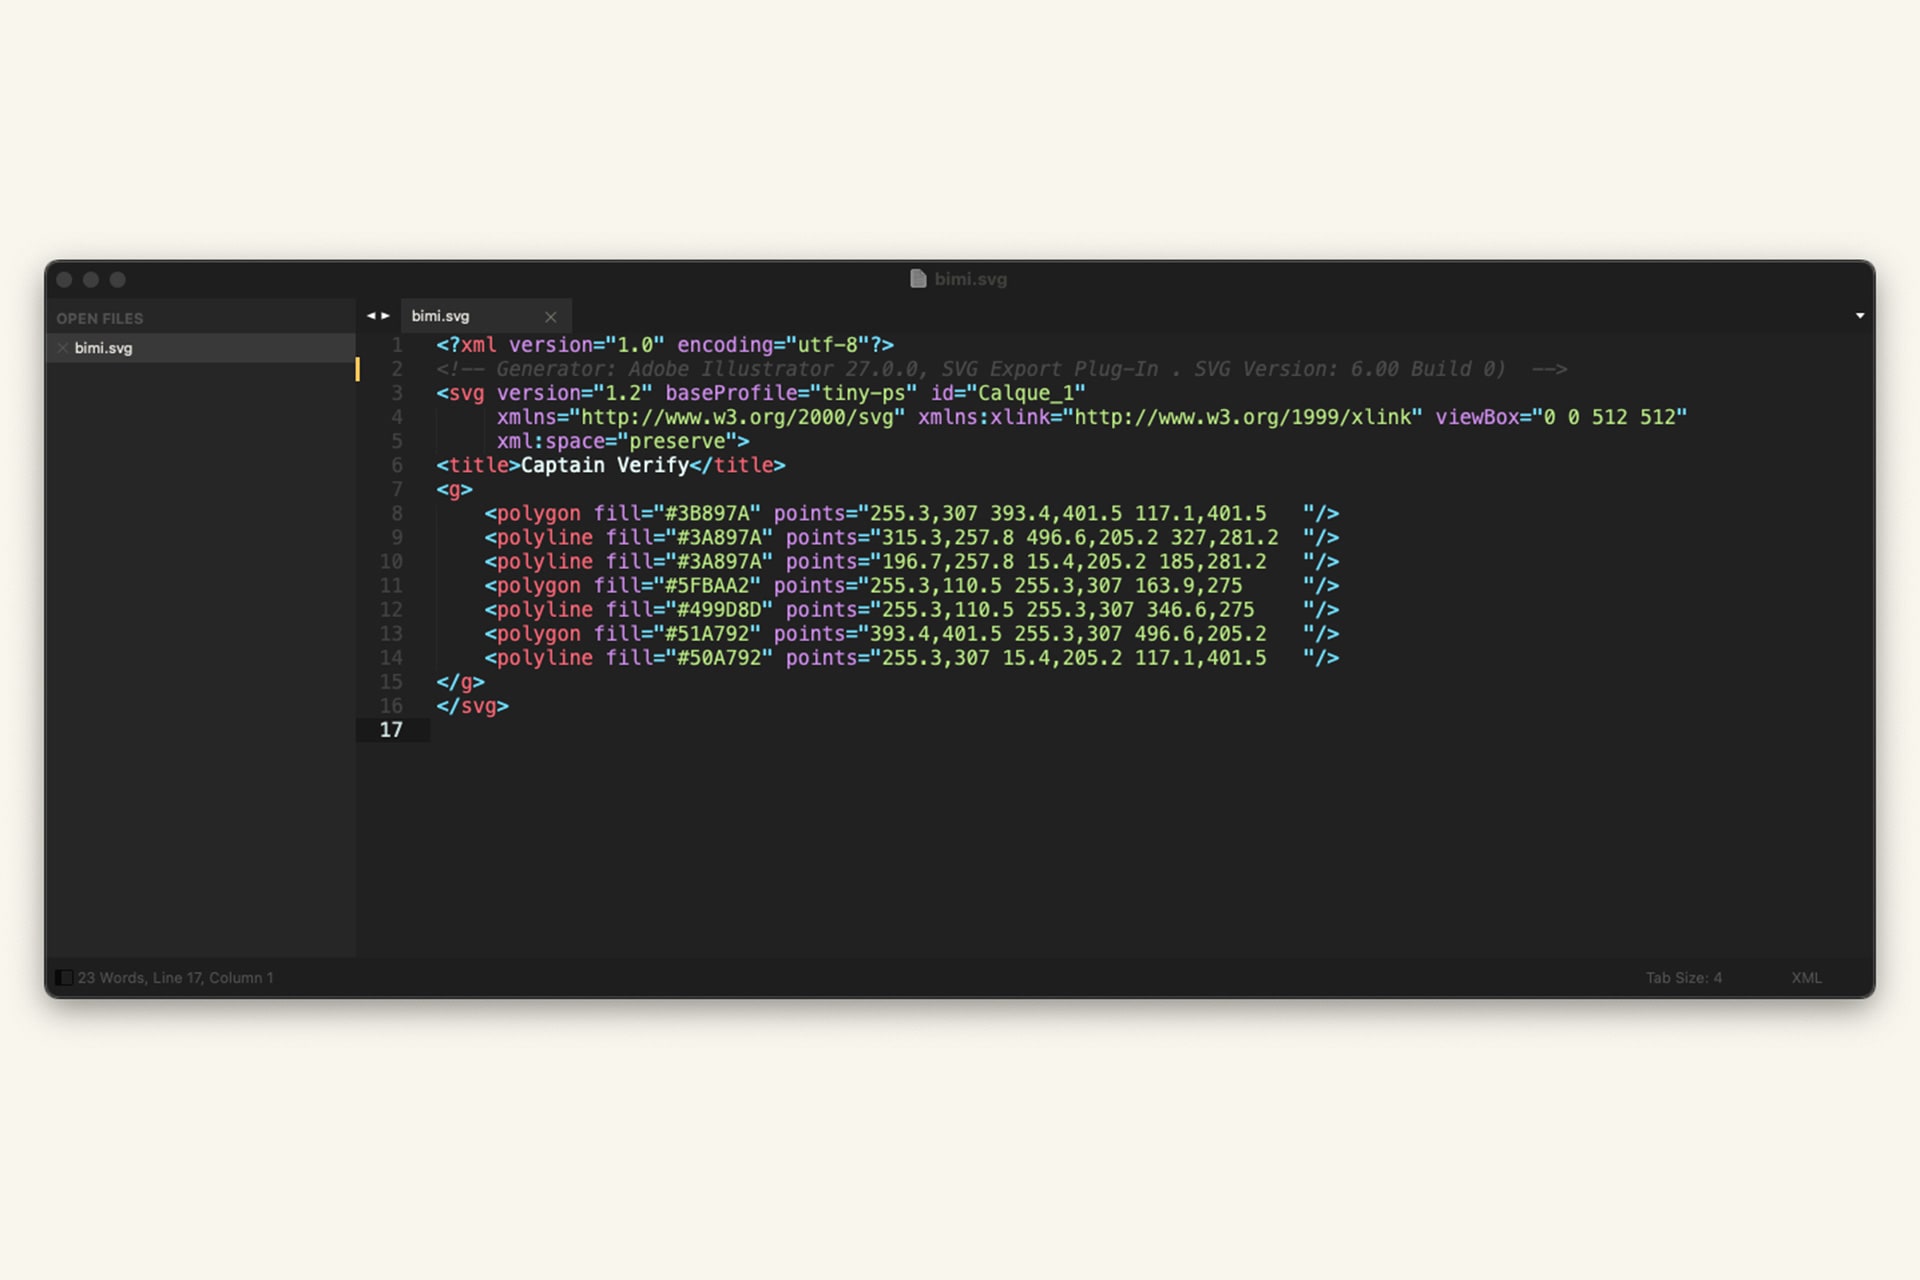
Once your SVG Tiny 1.2 logo has been exported, you can use a text editor to make your image compliant by adjusting the two lines of XML code that compose it.
Step 2: Convert your Tiny 1.2 SVG image to Portable/Secure Tiny SVG
To convert your Tiny 1.2 SVG image to Portable/Secure Tiny SVG using a text monitor, open it in your chosen text editor. There are free ones like Atom, Nano, CodePen or Sublime Text for example.
To modify the XLM code, start by removing the x/y attributes if your image has them. Next, change the base profile (“baseProfile” or “tiny”) to “tiny-ps”. Finally, add the title that suits you, for example “Captain Verify”. This must not contain more than 64 characters. After that, you can save your image.
Good to know:
The other option you have to convert your Tiny 1.2 SVG image to Portable/Secure Tiny SVG is to use the tools available at site BIMI Group.


")

